 Groomed Home Smarter Living

Dusting may not seem difficult but there are a few rules to follow, or you’ll be right back where you started.
Check your supplies

Good tools are an essential part of dusting. There are tons of products on the market, and they all have their benefits/issues. You will need to use the right tool for the job. Here’s a quick overview of pros/cons for dusting tools.
Dampened cotton fabrics are good for furniture and floor; static electricity can be neutralized thanks to dryer sheets; paint brushes can get into crevices.
For simpler, quicker cleaning, put all your dusting supplies in a same bag or basket.
You will mainly need:
– Cleaning rags
– Disinfectants
– A vacuum cleaner
Close it up

Windows and doors need to be closed during the dusting process. Dust and debris spread because of wind and blowing into your home. It is always a good idea to double-check that both doors and windows have weather-stripping and that it works properly.
Top to bottom, and back to front

Dust falls from top to bottom, so you need to clean in the right direction. Always start with the highest items, going down, to prevent going over surfaces multiple times. Clockwise cleaning motions (aka spiral formation) will allow you to get into all corners and moldings. An extra bonus is whatever dust falls from the top will be cleaned when you reach the bottom.
The back of appliances is oftentimes overlooked, so it’s always a good idea to start there. Grease, crumbs and debris accumulate in those places (plus bonus insects). You should try to move the appliances out of the wall and unplug them. Slightly amp sponge mops (and long-handed) will be best to remove dust from the back.
Shiny is dusty

Just because you can see your reflection in the mirror does not mean it is clean (or dust-proof). Glass and windows need to be cleaned just as much as wooden tables. Try avoiding paper towels as these will leave lint. Clean terry cloth is always best. The goal is to make the surface sparkle.
Don’t overlook spots

Many corners and other surfaces are often overlooked during dusting. Spiderwebs will probably be in corners, as well as pet hair. With a feather duster you can reach intricate places, such as walls and drawers. Avoid using it on flatter surfaces as this will only spread the dust.
Ceiling fans, tops of doorways, bookshelves and light fixtures are just as important. A bendable, long-handed duster will avoid the use of a ladder. They’re also pretty cheap, and adjustable. If you don’t own one, take out a mop pole, flip inside out an old sock, and place it at the end. Worst-case scenario, secure a microfiber cloth with an elastic band.
Vacuum-seal the dusting
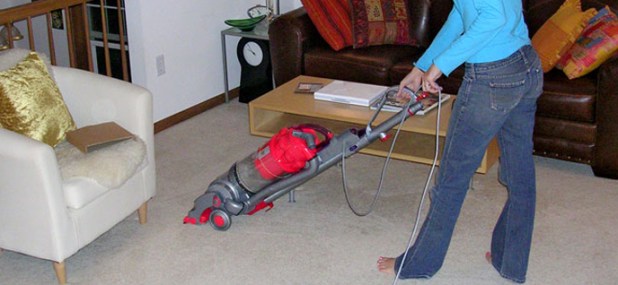
Although we won’t be literally “vacuum-sealing” dust here, we’ll be securing all your work with the cleaner. All the dust you’ve dislodged is most likely on the floor by now. As we’ve said, going from to bottom means concluding your dusting with some healthy vacuum cleaning. If you’re to reach more delicate areas, avoid sucking up valuable items by covering the vacuum nozzle with a brush wrapped in pantyhose. Bathroom vents also get pretty dirty and are great to vacuum. Finally, it’s also good to vacuum both drapes and blinds every other week to avoid buildup.


